How to 'safely' remove the top plate... (or 'how can I open the instrument box and have a good chance of returning it to its original configuration ?')
...Let us state immediately that the ONLY part that should ever be removed from a stringed instrument (violin, viola, cello, bass) is the top plate (belly).
...The fingerboard, nut, and saddle may at times also need to be removed but the neck, ribs, back plate, liner strips, corner and end blocks are meant to be permanently joined and only under the most dire circumstances should these ever be removed.
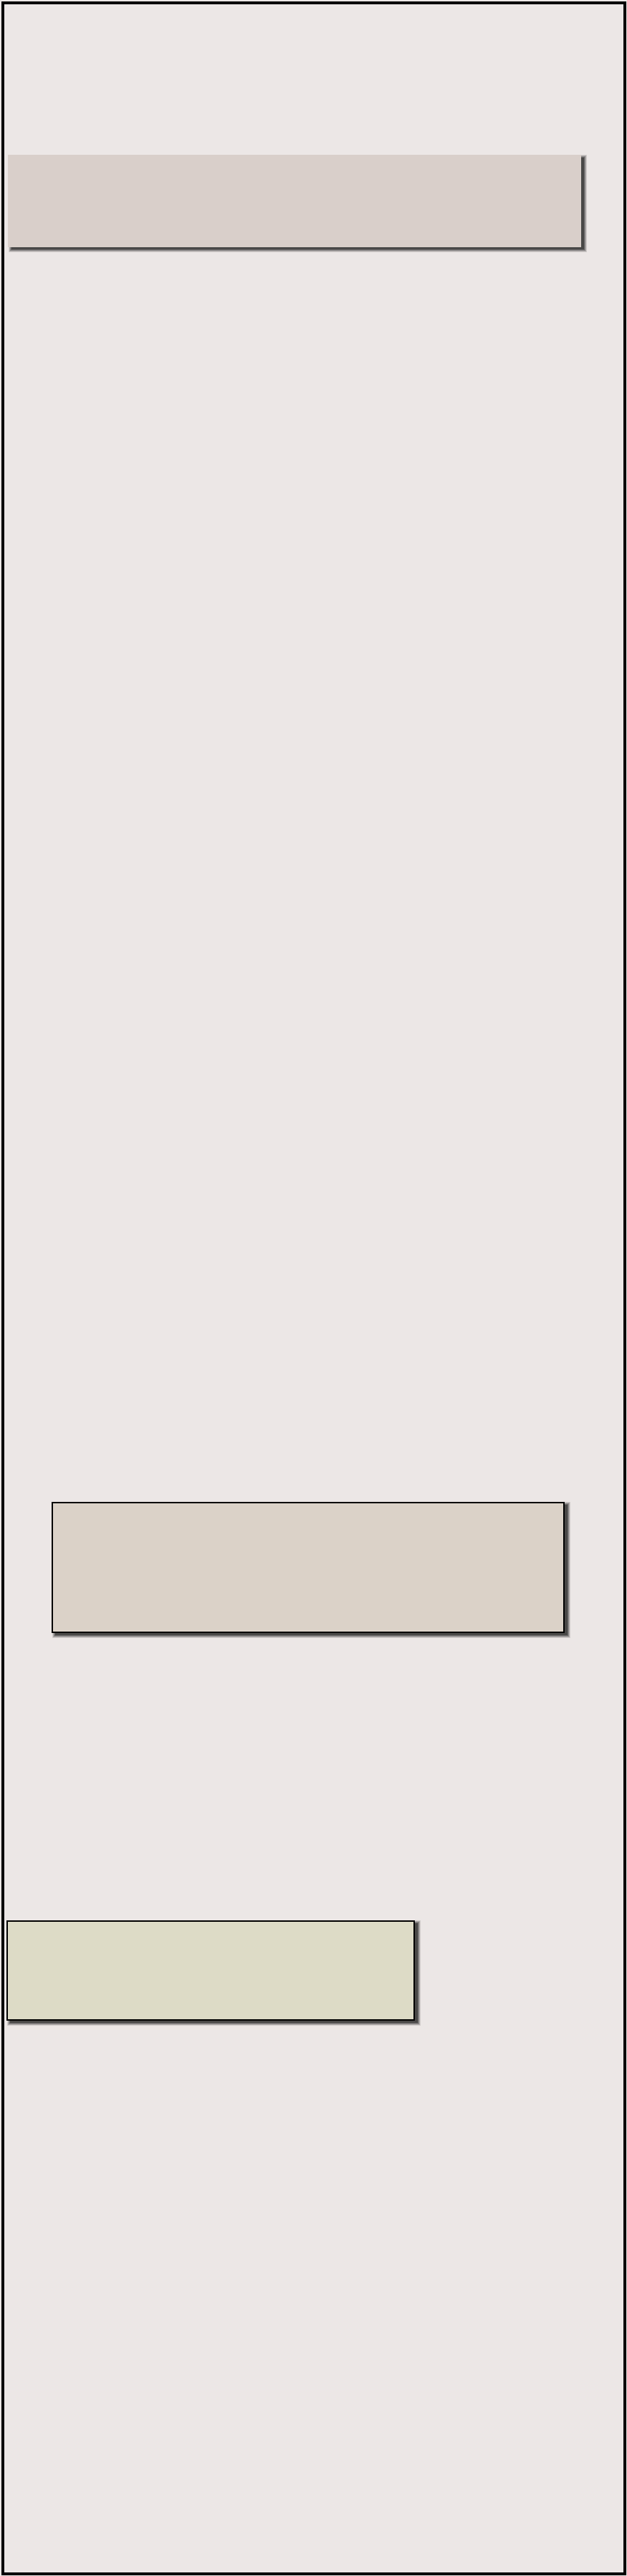
... The key to successfully removing the top plate (belly) and getting it back exactly is to make an alignment fixture before removing the top plate. This fixture must hold the insturment securely and accurately registar the neck location and angle in respect to the rest of the violin body. The fixture must allow for the easy installation and removal of same and access for fitting perhaps eight violin clamps when rejoining the plate before removing it from the fixture so that the rest of the clamps might be installed.
...I will share the fixture I use which gets the job done and is relatively easy to build:
GTX091936
...The alignment fixture is made of 3/4" straight lumber. The four arms are made level and the correct width for the upper and lower bouts (slightly too wide). We will use paper shims (cut up business cards are good) to adjust either under or on the sides for a snug fit.
...A shim is added under the 'foot' of the neck to exactly fit between the fixture and the instrument. Tape the necessary shims in place with a piece of tape.
...Make a spacer block that exactly fits between the fixture and the curve under the neck; use shims as necessary and tape in place.
A#/Bb
...A violin fitted to the alignment fixture. Now you can remove the violin and then remove the top plate; to do your repair or adjustment inside.
...Before you re-glue, I recommend you do two additional things:
First, store the wood parts in a desiccant drier for a day or two just before warming wood (to about 100 degrees F.) and reglueing. This will remove excess moisture from the wood, but especially from the softer spruce top wood. Then when re-assembled and the instrument picks up moisture from the air, it will swell tightly together. However, if the weather gets very dry (low realitive humidity) your instrument should be safe. {the wood shrinks cross grain and it may crack the top plate unless you have done this precautionary step}.
.

...Secondly, Warming the wood parts to about 100 degrees F. will make the violin making glue flow freely and give a better bond.
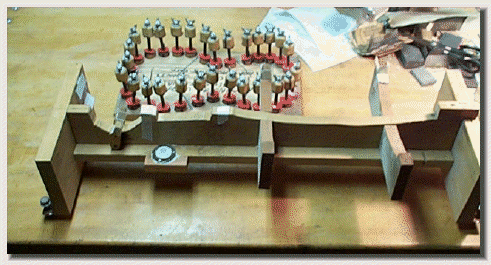
...The warm box I made is an insulated box with two porcelin light bulb fixtures in the bottom opposite corners. On the outside is a light fader switch to regulate temperature, and a thermometor to measure temperature inside the box.
...Notice that there is a paper towel under the varnished instrument to protect the varnish from the heat of the rack.
...When you remove the parts from your warm box (or from out in the sun, enough to warm the parts) you need to immediately put the parts into the assembly fixture as you apply glue to the bond surfaces. From the time you remove (from the warm box/sunlight) a piece until it is glued, put in place, an clamped should be less than one minute.
(close all doors and windows to prevent cooling drafts which might chill the glue during this gluing operation)
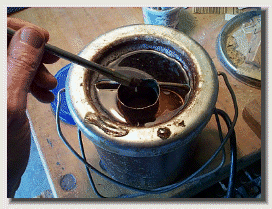
...This is the water bath heater that keeps the glue at 150 degrees F. Thin the glue (with warm water) so that it just smoothly runs off the glue brush; using freshly mixed glue is a good idea for this critical glue joint.
...Most instructional books suggest that you make the glue extra (1/2 strength) thin so the top may be more easily removed in the future should repairs become necessary. {I have a hard time making myself do a weak glue job and tend to make this joint strong also.}
..Of course, another reason is that the top will be easier to remove for future repairs, or if a sudden impact occurs, the glue joint will release without cracking the plates. Re-gluing being relatively easier to do.
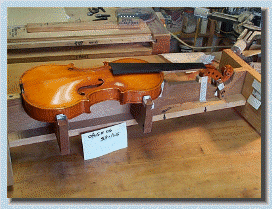
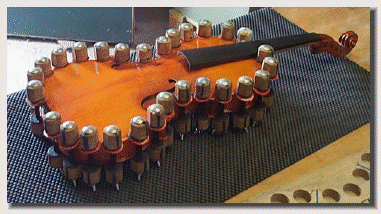
...The first ten spool clamps are applied with the parts fixtured in the alignment fixture. Then the assembly is removed and the rest of the clamps applied. I find it easier to install these first 10 clamps with the wing nut upwards, but apply the rest with the wing nuts away from the glue joint (pointing downward) after you gently lift the body out of the assembly fixture.
...Then, turn the original ten clamps over. Evenly tightenly the clamps again. Using clean warm water from your glue pot, brush the glue joints exposed edges all around, drying with a paper towel as you go (do a small area at one time). This hot water (150 F) will reset the glue and leave a clean exterior surface. Check the tightness of the clamps every hour or so (just a firm finger tight). Let the body dry overnight at room temperature. Next day, remove the clamps, wash the surface as needed with warm water and a soft rag to remove any surface glue traces. You might want to run a line of varnish around the glue joint but it might not be necessary.
Apply these 10 clamps first before removal from the alignment fixture:
...As you apply the clamps, visually check the fit and edge overhang, adjust as necessary by applying a little side push to the ribs as necessary to get parts re-aligned. Take enough time to get it right, but work quickly. (remember, the hot water wash around the perimeter later will reset the glue).
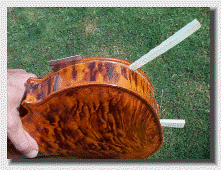
...Now for some tips on actually separating the top plate from the body...
(Now remember that the violin has been carefully fitted to the alignment fixture first.)
...The easiest case is the old insturment with failing top plate glue joints:
(Perhaps several areas around the perimeter have opened up and you want to completely remove the top).
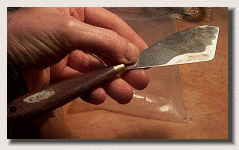
...There are special 'separation knives' available from a luthiers supply catalog which are really just thin steel blades which are wider at the end and tapered so the end is flexible. One inserts these into the already opened glue seam and slide it toward the still glued area. You may hear loud snapping noises as the old and fragile glue joints let go, this is normal. Work carefully and in both directions. The areas over the four corner blocks need to be worked from inside (pulling out from inside with the separation knife) as well as from the sides. The end blocks areas need special care as the glue joint there may still be strong and the wood of the top plate is weak there (because of the interuption of the neck and saddle in the plate (also there is no purfling there which greatly reinforces and strengthens the edges of the top plate else where), so work the block areas and especially the end block joints alternately from both sides.
...Often times, some wood transfers (stays glued to the opposite side and breaks apart somewhere other than at the original glue joint). This is more common over the corner and end blocks. As long as these areas are small and the break does not develop into a crack going up into the plate; these areas will act like 'keys' when regluing and will not affect the strength when re-glued.
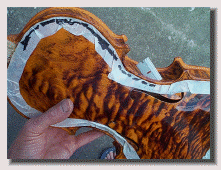
...Small thin wood wedges can be inserted in already opened areas to decrease the pressure on the separation knife and help break the glue joint.
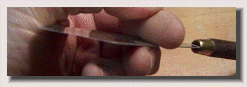
...Here I have put on some masking tape and I mark those areas that are separated already. Note the razor blade being inserted. Look at the razor blade and be sure it is parallel to the glue joint, if not, start again somewhere else and work back to that area from a different direction. On re-glueing, be sure to put a little glue into any split wood areas for a strong joint.
... The plate separation knife has a thin tapering steel blade which can be worked back and forth at the glue joint (working straight in horizontally) and it should gently break the glue joint. The knife is worked around the perimeter until the glue joint is broken all around and the top can be lifted off the violin body. Approach each corner block and the two end blocks from both sides and work carefully as these are the areas that are most strongly glued (largest glue surface areas).
Modified 7/2017
Page AA_31