Prior to this step, I have laid out the peg locations and drilled pilot holes, and then 3/16" holes through, with the neck held in a support fixture to get the holes 90* and straight. ( 3/16" will allow ream to start).
The next cuts are critical to the success of the instrument as they determine 'stop' (vibrating string) length, bridge height, and finger board height.
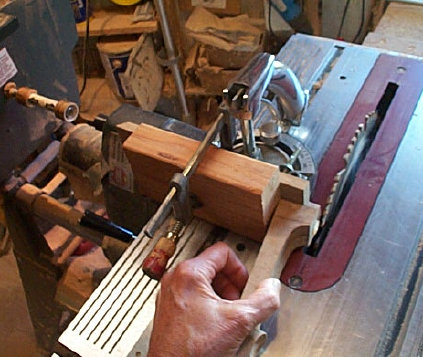
..Set the saw blade at 90 degrees to the table with square accurately.
(For my model, the neck back angle is 83.5* and the location of the cut determines how long the vibrating length of the string will be. Average for full sized violins is 12-15/16"; I use 13" as my 'stop' length because the model I use is slightly longer (14 1/8" vs. 14" body measurement).
Neck is clamped firmly to prevent shifting during sawing. If you have the equipment, this could be angle sanded or cut on a band saw also.
The neck root is cut at 89* to the neck's back surface,to allow for 1* back plate up slope. The height of this cut will determine the height of the finger board above the body at the neck joint. (0.250" exactly)
Here I have sliced the neck wood from the support block, leaving just a thin layer of the original support block wood still glued to the maple neck. This layer is sanded and chiseled off to reveal the original neck top surface. This could be made easier by gluing with a piece of sack brown paper in the joint.
Modified 9/2017
Page O16C_62
..Space the neck base up with shims so the neck centerline is horizontal; scroll button just touching the saw table.
[To insure a square cut and straight neck to body joint.]